Swap a physical SIM or eSIM
This support article will give you key information about how to swap your existing SIM and transfer your Vodafone number to a new physical SIM or eSIM.
iPhone to iPhone SIM transfer
For iPhone 6s & newer models
If you have an eSIM enabled iPhone and are using a physical SIM, you can transfer your service to a new eSIM either on the same phone or on a different phone, as long as the phone you’re transferring from is an iPhone 6s model or above. Just follow these steps or head in store. You can also check out our list of eSIM enabled devices on our eSIM support page.
How to go from a physical SIM to an eSIM on the same iPhone
Update your device
Ensure your iPhone is updated to the latest iOS software.
Download plan
In the Settings app, go to ‘Mobile’, then select your phone number under ‘Mobile Plans’. On the next screen, choose ‘Convert to SIM’ and follow the prompts.
Wait up to 15 minutes
Once you've completed the steps, your iPhone should be ready to use with the eSIM within 15 minutes.
Check for successful transfer
You can check the transfer has successfully completed by going back to your Settings app from the Home screen and choosing ‘Mobile’. Your phone number should now appear under ‘Mobile Plans’, labelled ‘Used as “Primary”’ and set to ‘On’.
How to go from a physical SIM on an iPhone to an eSIM on another iPhone
Update your devices
Ensure both iPhones are updated to the latest iOS software.
Download plan
In the Settings app of the iPhone you’re transferring to, go to ‘Mobile’, then ‘Add Mobile Plan’ and follow the prompts. Ensure both iPhones are close to each other during the transfer.
Wait up to 15 minutes
Once you've completed the steps, your iPhone should be ready to use with the eSIM within 15 minutes.
Check for successful transfer
You can check the transfer has successfully completed by going back to your Settings app from the Home screen and choosing ‘Mobile’. Your phone number should now appear under ‘Mobile Plans’, labelled ‘Used as “Primary”’ and set to ‘On’.
You can transfer your service from an eSIM on an iPhone to an eSIM on another iPhone by following these steps or heading in store. You can check out our list of eSIM enabled devices on our eSIM support page.
How to go from an eSIM on one iPhone to an eSIM on another iPhone
Update your devices
Ensure both iPhones are updated to the latest iOS software.
Download plan
In the Settings app of the iPhone you’re transferring to, go to ‘Mobile’, then ‘Add Mobile Plan’ and follow the prompts. Ensure both iPhones are close to each other during the transfer.
Wait up to 15 minutes
Once you've completed the steps, your iPhone should be ready to use with the eSIM within 15 minutes.
Check for successful transfer
You can check the transfer has successfully completed by going back to your Settings app from the Home screen and choosing ‘Mobile’. Your phone number should now appear under ‘Mobile Plans’, labelled ‘Used as “Primary”’ and set to ‘On’.
Once you've completed these steps, your new iPhone should be ready to use with the eSIM within 15 minutes.
You can transfer your service from multiple SIMs (physical SIM and eSIM) on one iPhone to an eSIM on another iPhone by following these steps or heading in store. You can check out our list of eSIM enabled devices on our eSIM support page.
How to transfer your services from multiple SIMs on one iPhone to an eSIM on another iPhone
Update your devices
Ensure both iPhones are updated to the latest iOS software.
Download plan
In the Settings app of the iPhone you’re transferring to, go to ‘Mobile’, then ‘Add Mobile Plan’. Select one of your phone numbers and follow the prompts. Ensure both iPhones are close to each other during the transfer.
Wait up to 15 minutes
Once you've completed the steps, the phone number you selected should be ready to use on your iPhone within 15 minutes.
Add your other phone number
Once the SIM swap is in progress and you press ‘Close’, the next screen will prompt you to add your other phone number. Choose ‘Transfer Mobile Plan’ and follow the prompts.
Check for successful transfer
You can check the transfer has successfully completed by going back to your Settings app from the Home screen and choosing ‘Mobile’. Both of your phone numbers should now appear under ‘Mobile Plans’. You can then set your preferred SIM settings.
iPad to iPad SIM transfer
For iPad (7th gen), iPad mini (5th gen), iPad Air (3rd gen), iPad Pro 11 (1st gen), iPad Pro 12.9 (3rd gen) & newer models
If you have an eSIM enabled iPad and are using a physical SIM, you can transfer your service to a new eSIM either on the same iPad or on a different iPad, as long as the iPad you’re transferring from is an eligible model (see above). Just follow these steps or head in store. You can also check out our list of eSIM enabled devices on our eSIM support page.
How to go from a physical SIM to an eSIM on the same iPad
Update your device
Ensure your iPad is updated to the latest iPadOS software.
Download plan
In the Settings app, go to ‘Mobile Data’, then select ‘Convert to eSIM’ and follow the prompts.
Wait up to 15 minutes
Once you've completed the steps, your iPad should be ready to use with the eSIM within 15 minutes.
Check for successful transfer
You can check the transfer has successfully completed by going back to your Settings app from the Home screen and choosing ‘Mobile Data’. Your Mobile Plans list should show ‘voda AU’ Active & ‘voda AU’ Converted to eSIM.
How to go from a physical SIM on an iPad to an eSIM on another iPad
Update your devices
Ensure both iPads are updated to the latest iPadOS software.
Download plan
In the Settings app of the iPad you’re transferring to, go to ‘Mobile Data’, then select ‘Transfer Plan from Another iPad’ and follow the prompts. Ensure both iPads are close to each other during the transfer.
Wait up to 15 minutes
Once you've completed the steps, your iPad should be ready to use with the eSIM within 15 minutes.
. Check for successful transfer
You can check the transfer has successfully completed by going back to your Settings app from the Home screen and choosing ‘Mobile Data’. Your Mobile Plans list should show ‘voda AU’ Active.
You can transfer your service from an eSIM on an iPad to an eSIM on another iPad by following these steps or heading in store. You can check out our list of eSIM enabled devices on our eSIM support page.
How to go from an eSIM on one iPad to an eSIM on another iPad
Login to My Vodafone
Ensure both iPads are updated to the latest iPadOS software.
Download plan
In the Settings app of the iPad you’re transferring to, go to ‘Mobile Data’, then select ‘Transfer Plan from Another iPad’ and follow the prompts. Ensure both iPads are close to each other during the transfer.
Wait up to 15 minutes
Once you've completed the steps, your iPad should be ready to use with the eSIM within 15 minutes.
Check for successful transfer
You can check the transfer has successfully completed by going back to your Settings app from the Home screen and choosing ‘Mobile Data’. Your Mobile Plans list should show ‘voda AU’ Active.
You can transfer your service from multiple SIMs (physical SIM and eSIM) on one iPad to an eSIM on another iPad by following these steps or heading in store. You can check out our list of eSIM enabled devices on our eSIM support page.
How to transfer your services from multiple SIMs on one iPad to an eSIM on another iPad
Update your devices
Ensure both iPads are updated to the latest iPadOS software.
Download plan
In the Settings app of the iPad you’re transferring to, go to ‘Mobile Data’, then select ‘Transfer Plan from Another iPad’ and follow the prompts. Ensure both iPads are close to each other during the transfer.
Wait up to 15 minutes
Once you've completed the steps, the phone number you selected should be ready to use on your iPad within 15 minutes.
Add your mobile data plan
Once the SIM swap is in progress and you press ‘Close’, the next screen will prompt you to add your other mobile data plan. Choose ‘Transfer Your Mobile Plan’ and follow the prompts.
Check for successful transfer
You can check the transfer has successfully completed by going back to your Settings app from the Home screen and choosing ‘Mobile Data’. Both of your mobile data plans should now appear under ‘Mobile Data’ as ‘voda AU’ Active.
SIM transfer for Android and other iPhone & iPad models
To get a free replacement physical SIM card, head to your nearest Vodafone store with your primary and secondary government issued ID (expired IDs will not be accepted). You can also request a new SIM card if you are upgrading your plan or device online. Once you have your replacement physical SIM, you can activate it through the My Vodafone webpage following the steps below or by heading in store.
To activate your new physical SIM, you’ll need the last 10 digits of your new SIM number. Here’s how you can find your new SIM number.
How to activate a replacement physical SIM through My Vodafone
Get replacement SIM
Get your replacement physical SIM in store or as part of an online upgrade.
Login to My Vodafone
Login to My Vodafone via your web browser. If you’re on a plan, navigate to 'Your plans' and click on 'Swap my SIM'. For Prepaid, 'Swap my SIM' is under 'Account Settings'. Activate your replacement physical SIM by following the steps.
Wait a couple of minutes
Once you've completed the steps, wait a couple of minutes. If you kept your old physical SIM in your device, it will stop working. Insert your new replacement physical SIM into your device. You may need to turn your phone off and on.
If you have an eSIM enabled device, you can go from a physical SIM to an eSIM at any time through the My Vodafone app or by heading in store. You can check out our list of eSIM enabled devices on our eSIM support page.
How to go from a physical SIM to eSIM
Login to My Vodafone
Login to the My Vodafone app, and navigate to 'Your plans', then click on 'Swap my SIM'. Follow the prompts and make sure you select ‘eSIM’ when asked if you’re transferring your current SIM to a ‘Physical SIM card’ or to an ‘eSIM’.
Follow the prompts
Follow the prompts to login to your account and make sure you’re using the device you’re swapping your SIM to. After submitting your SIM Swap, continue following the prompts to activate your new eSIM.
Wait a couple of minutes
Once you've completed the steps, wait a couple of minutes. If you kept your old physical SIM in your device, it will stop working. You may need to turn your phone off and on.
Set up your eSIM
Once you have downloaded and activated your new eSIM, make sure you set up your preferred SIM settings on your device. For more information, head to our eSIM support page.
To get a free replacement physical SIM card, head to your nearest Vodafone store with your primary and secondary government issued ID (expired IDs will not be accepted). You can also request a new SIM card if you are upgrading your plan or device online. Once you have your replacement physical SIM, you can activate it through the My Vodafone webpage following the steps below or by heading in store.
To activate your new physical SIM, you’ll need the last 10 digits of your new SIM number. Here’s how you can find your new SIM number.
How to go from an eSIM to a physical SIM
Get replacement SIM
Get your replacement physical SIM in store or as part of an online upgrade.
Login to My Vodafone
Login to My Vodafone via your web browser. If you’re on a plan, navigate to 'Your plans' and click on 'Swap my SIM'. For Prepaid, 'Swap my SIM' is under 'Account Settings'. Activate your replacement physical SIM by following the steps.
Wait a couple of minutes
Once you've completed the steps, wait a couple of minutes. The active eSIM in your device that you have swapped will stop working. Insert your new replacement physical SIM into your device. You may need to turn your phone off and on.
If you have an eSIM enabled device, you can request a replacement eSIM at any time through the My Vodafone app or by heading in store. You can check out our list of eSIM enabled devices on our eSIM support page.
How to request a replacement eSIM
Login to My Vodafone
Login to the My Vodafone app and navigate to 'Your plans', then click on 'Swap my SIM'. Follow the prompts and make sure you select ‘eSIM’ when asked if you’re transferring your current eSIM to a ‘Physical SIM card’ or to an ‘eSIM’.
Follow the prompts
Follow the prompts to login to your account and make sure you’re using the device you’re swapping your SIM to. After submitting your SIM Swap, continue following the prompts to activate your new eSIM.
Wait a couple of minutes
You may need to wait a couple of minutes. The active eSIM in your device that you have swapped will also stop working. You may need to turn your phone off and on.
Set up your eSIM
Once you have downloaded and activated your new eSIM, make sure you set up your preferred SIM settings on your device. For more information, head to our eSIM support page.
Additional information
Your device is designed to take a specific sized physical SIM. Here are the different physical SIM sizes available.
| Standard SIM |  |
| Micro SIM | 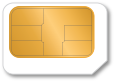 |
| Nano SIM |  |
Our standard physical SIM cards can be pushed out and resized as a full size, micro or nano SIM. If you’re unsure which size of physical SIM you need, check out our device guides or contact your device manufacturer.
No. You will keep the same mobile number for your service.
If you have contacts stored on your existing SIM, they won’t be available when your SIM card is replaced. You can copy contacts stored on your existing SIM onto your device before activating your replacement SIM card. For more information, check out our device guides.
No. Prepaid Starter Pack physical SIM cards can’t be used as a replacement physical SIM.
To find out how to insert your physical SIM card into your device, check out our device guides.